


Make sure to set up your Agent Profile and Listing Defaults in ShowingTime to take full advantage of this amazing member benefit!
Jump to Section
But first, what is ShowingTime, and why should you use it? Here is a quick video describing what ShowingTime can do for you! Also, below is a quick description (click here to download PDF version):
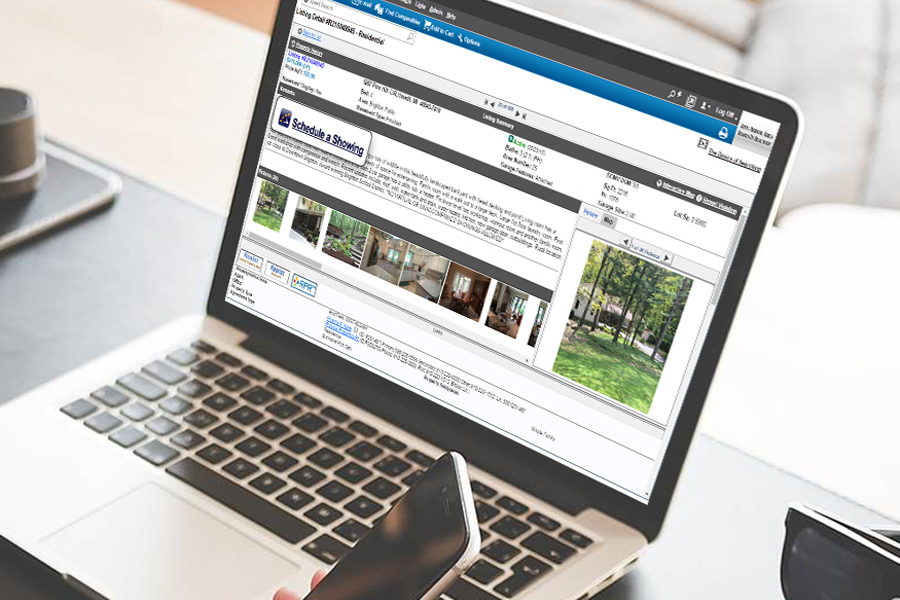
ShowingTime is a showing scheduler integrated with the MLS, enabling Participants and Subscribers to schedule and manage showings 24/7. It saves time, reduces calls, generates more showings and helps agents provide better service to their clients. Showing requests and appointments are made by buyer’s agents and seamlessly accepted by the seller’s agents by way of e-mail, text, automated phone call or mobile app. Simply select ‘Schedule a Showing’ in the MLS, or even create a tour using the ShowingCart.
Furthermore, ShowingTime has a built-in feedback system that allows the buyer’s agent to provide instant feedback, as well provides the listing agent with an easy-to-use dashboard to manage feedbacks received as well as outstanding requests.
In summary, here are just a few of the benefits of using ShowingTime:
- 24/7 online access to request showings
- Delivers requests immediately to listing representatives
- Reduces/eliminates showing-related calls, phone tag
- Generates feedback for listing agents/sellers
- Accessible via the ShowingTime Mobile App
- Enables showing agents to control their schedules
- Eliminates surprises by displaying showing instructions
- Helps sell homes more efficiently
How about we take 10 minutes and get your profile and listings set up right now?
If you have already completed your setup and are looking to dive in to the bells and whistles of the ShowingTime universe, please watch this demo to get started.
If you are looking for some step-by-step basic setup instructions, let’s begin!
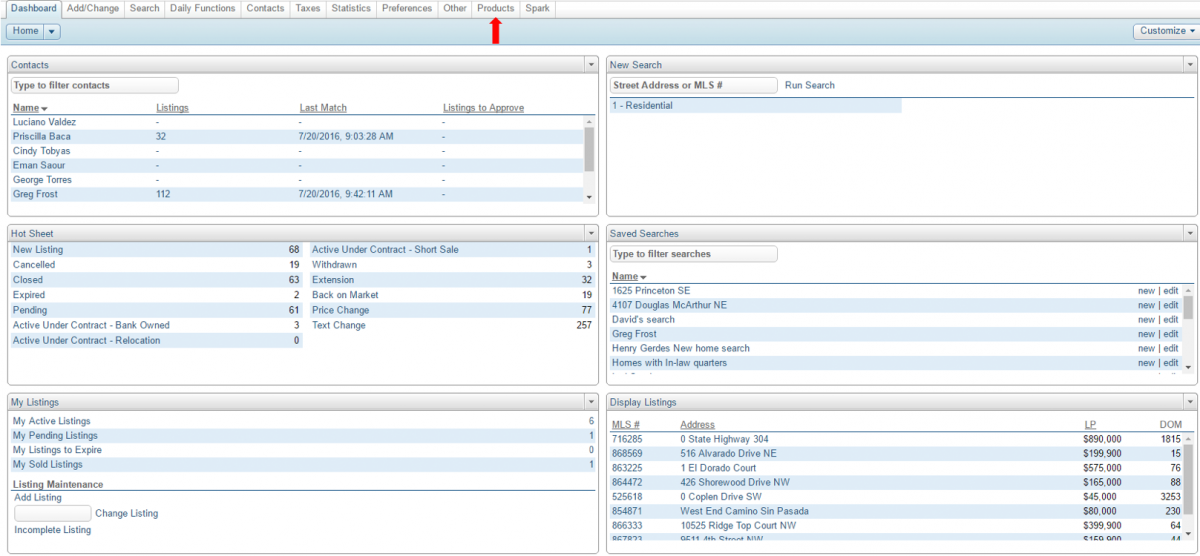
In your Flexmls account, hover over the ‘Products’ tab and select ‘ShowingTime.’
If you have not yet set anything up, you will see this notice:
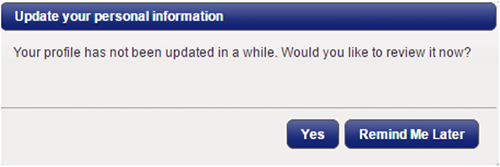
Select ‘Yes,’ and let’s get started!
MY AGENT SETUP (Back to Top)
You have arrived at your Home screen. On the left you will find several options. For now, let’s start with ‘My Agent Setup.’

Here, under ‘Profile Basics,’ you will enter in your default profile information, including your name, contact phone numbers, e-mail, etc.
For ‘Text Message,’ enter your cell phone number, then select your carrier from the drop-down menu. This will convert the number into the message type for that particular carrier (for example, mailto:5055055050@vtext.com would be a Verizon cell phone number).
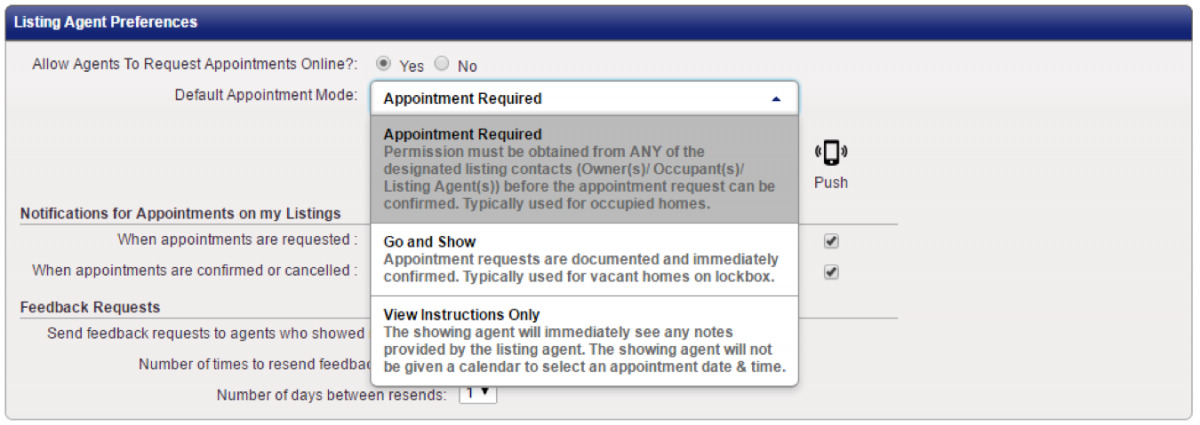
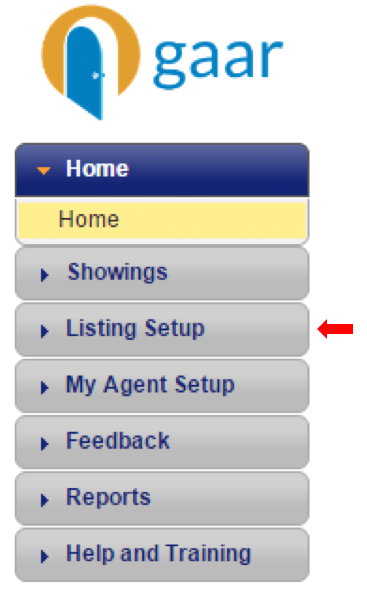
Next, scroll down to ‘Listing Agent Preferences.’ These are the default preferences for your listings, and determines how showing requests are handled when you receive notifications from other agents. Your Active listings have already been integrated into the ShowingTime system, which you may locate under ‘Listing Setup.’ We will get to that later!
Select your default appointment type from the drop-down menu. Explanations for each type are within the drop-down. You can change the appointment type on each individual listing later should you choose.
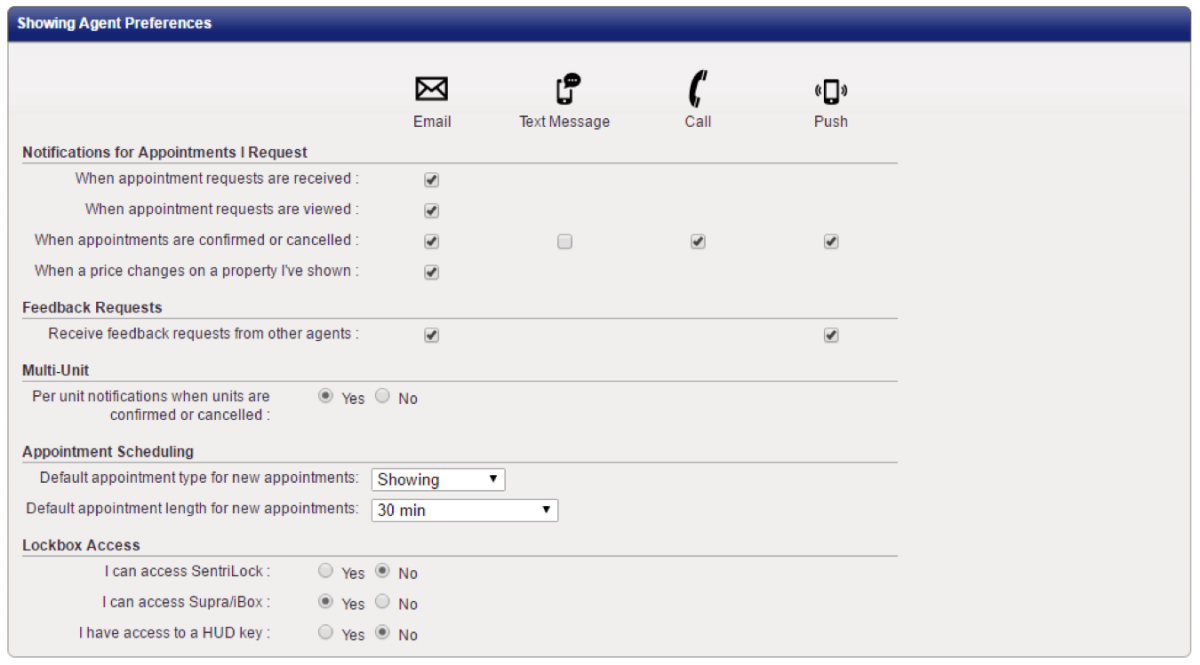
‘Notifications for Appointments’ is next. Here, you can select how you receive notices for showings requests you receive on your listings. E-mails are sent directly to the e-mail address you entered earlier. Text messages are sent to the phone number entered in the ‘Text Message’ field. ShowingVoice is an automated voice system from ShowingTime, which will call you directly to inform you of the request. Once you have downloaded and synced the mobile app to your ShowingTime account the push notification will be made available as well.
‘Feedback Requests’ is an exciting feature which will automate the process of requesting and managing feedback on your listings. Make your selections as necessary.
‘Showing Agent Preferences’ are your preferences for showings you request. You may make selections based on your personal preferences. If you have access to Supra lockboxes via an eKey or ActiveKey, select ‘Yes’ for ‘I can access Supra/iBox.’
If you are ready to add the mobile app to your phone, the next section is for you. Entering your e-mail in the ‘Mobile App Access’ and selected ‘Send Authentication Link’ will send a link to your e-mail so you may download the app and get starting with syncing the product. More information on the mobile app may be found here. For now, if you are not ready to complete this step, let’s continue getting your agent and listing profiles set up, then come back to the mobile app.
You do not need to enter any information in the ‘Appointment Download Service Key’ section.
Before you leave, how about adding a photo to your profile? Select ‘Upload Photo’ at the top left of the screen and find your best headshot!

Make sure to select ‘Save Changes’ at the top of the screen! Your Agent profile is finished!

LISTING SETUP (Back to Top)
Do you have Active listings ready for showing? How about we set them up too?
Prior to making any changes to an individual listing, all of your listings will be set to the defaults you specified while completing your Agent Setup. In other words, maintaining individual preferences on a listing-by-listing basis is not required, as your defaults will always appear for each listing. However, if you have listings with special showing needs, here is where you can maintain those listings.
After selecting ‘Listing Setup,’ you will see a list of all your Active listings. Select any individual listing to view the current instructions for that listing only. Any revisions made here will only effect the selected listing.
To update showing instructions for an individual listing, click on any listing, and there you will see the Showing Instructions for that listing.
Under ‘Appointment Handling,’ selecting ‘Yes’ allows Participants and Subscribers using ShowingTime to request a showing. Selecting ‘No’ removes the listing entirely from the view of other agents in ShowingTime. It may still be shown via other methods.

‘Appointment Settings’ include the ‘Appointment Type’ and ‘Feedback Template.’ The ‘Appointment Type’ default is what was selected during the Agent Setup, but may be changed here on a per listing basis. The default Feedback Template is created by ShowingTime, but you may create your own in ‘Feedback Form Design’ in under the ‘Feedback’ tab.
‘Contacts’ is where information is entered for the listing’s contact details. As listing agent, your information, as well as your listing preference defaults, will appear. You may also enter ‘Owner/Occupant’ information, as well as provide them will the ability to confirm appointments, as well as enter ‘Co-Listing Agents.’ ‘Advanced Notifications’ may be used when an appointment request is in danger of being missed, declined, or cancelled.
Within the contacts section, the column on the left, ‘Can Confirm Appts By,’ determines who may confirm showing requests, and how they will receive the requests. The column on the right, ‘Notify of Confirmed/Canceled Appts By,’ shows who will receive confirmed/cancelled showing notifications, and how they will be received.
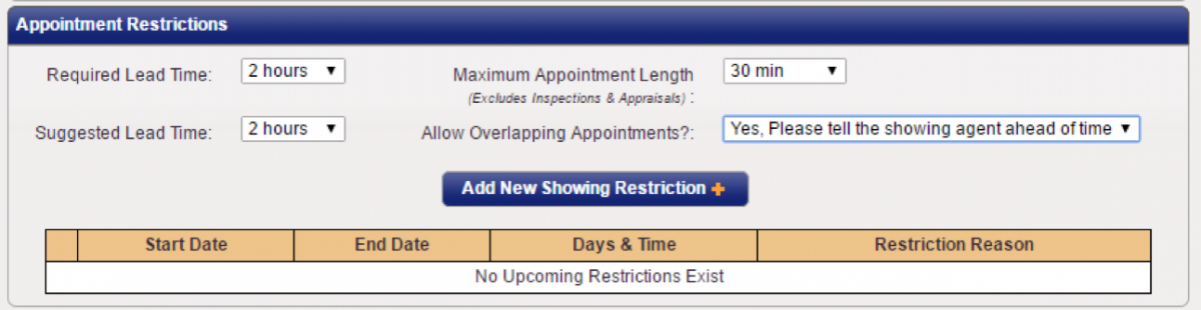
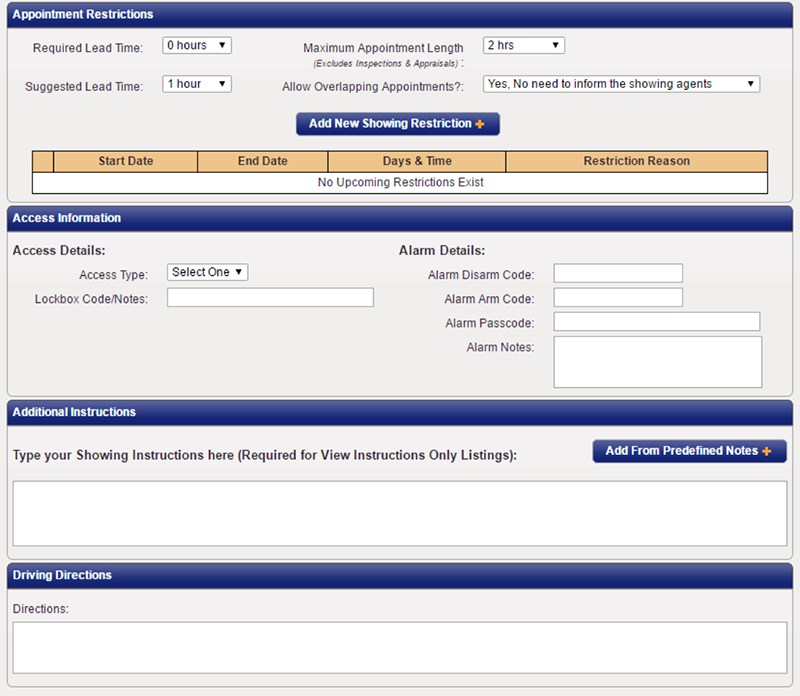
‘Appointment Restrictions’ allow listing agents to enter special restrictions regarding lead times (suggested and/or required), appointment length and overlapping appointments. In addition, you may add a custom restriction by selecting ‘Add New Showing Restriction.’
The final three sections, ‘Access Information,’ ‘Additional Instructions,’ and ‘Driving Directions’ are not required, however, allow you to provide even more details regarding the showing of that particular property. Does the home have a Supra lockbox? Select Supra iBox from the ‘Access Type’ drop down. Is there an alarm? Under ‘Alarm Details,’ enter any appropriate information, such as the disarm/arm codes and the alarm’s location. If you have LO/SO notes in Flexmls you would like placed here, simply copy and paste from the listing to the ‘Additional Instructions’ field. There are also some ‘Predefined Notes’ from ShowingTime that you can use.
There you have it! Your ShowingTime is working for you, 24/7.
How about some additional resources?
- Are you ready to take the next step in your ShowingTime product? (Click me!)
- Would you like to sync your ShowingTime to your mobile phone for instant push notifications? (Check this out!)
There are also a lot of helpful tutorials and videos within the ShowingTime dashboard. Simply locate ‘Help and Training’ on the left side of the screen, and there you will find training topics.
For starters, we recommend taking a look at the following topics and resources:
- Profile & Settings
- Listing Worksheet
- Listing Configuration and Settings
- Listing Worksheet Layout
- ShowingCart - Feedback
- Feedback Management - Reports
- Listing Activity Report - Mobile
CONTACT (Back to Top)
ShowingTime Support
Phone: 800-379-0057
E-Mail: support@showingtime.com
Live Chat: http://www.showingtime.com/support


Comments