


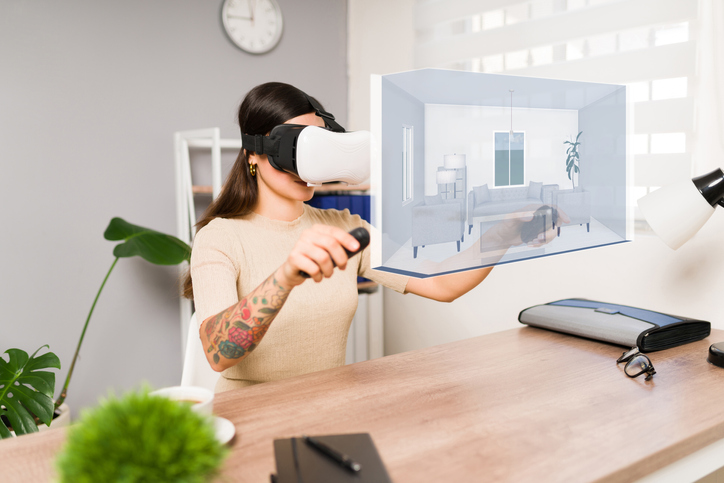
360-degree tours give listings an extra edge and weed out the window shoppers from serious buyers. So now the question is, do you hire a professional or create your own?
I was an early adopter of 360-degree tours for listings in 2014 because I saw both the value in distinguishing myself from the competition and the benefits for buyers and sellers alike. We’ve used them for every listing no matter the price point, and our portfolio includes over 120 tours across various platforms.
Today there are more options than ever to capture and display listings.
So why should you be using 360-degree technology?
Working With a Professional
According to Smigrod, more than 50% of all real estate agents outsource real estate photography and virtual tours to professional real estate photographers.
“As a real estate agent, if you have a multimillion-dollar listing, are time-poor or want ultra-premium results, you should always hire a professional,” he says.
Hiring a professional to create a standalone 360-degree tour will typically cost around $200. The 360-degree tour service is often sold either as part of a marketing package or as a package add on. Searching for local providers in my area in Minnesota, the results showed that several companies offer packages that include photos, a virtual tour and a floor plan for between $340 and $475. Most quoted a turnaround time between 24 and 48 hours.
Many camera providers also have a network of photographers, with a directory on their websites where interested clients can book directly with the photographer. For example, Asteroom has on-demand photographers in over 70 metro areas. Clients can book with the photographer for a $299 package that includes a 3D tour, floor plan, 30 MLS shots and virtual twilight shots.
Going the DIY Route
Creating DIY 360-degree tours isn’t as out of reach as it may seem. In fact, Smigrod says he’d prefer to do so.
“In this piping-hot market, with such easy access to the 360-degree cameras and photo editing technology, if I were [an agent], I would definitely be shooting 360-degree virtual tours myself,” he says. “It gives you an instant advantage over your competition.”
There is an upfront cost to think about. Going DIY means acquiring the necessary technology if needed and covering ongoing hosting fees. Smigrod recommends deciding on which platform first, then picking out a camera and additional equipment. The process to create, capture and edit a tour is different for each platform, and the way the properties are displayed and navigated differs, so choose your preferred platform and then find a compatible camera.
Hosts charge either a flat fee or an ongoing monthly payment. BoxBrownie offers a flat fee per tour, starting at $16. Asteroom is $59 per tour. Ricoh costs around $45 a month, and Matterport’s most popular plan is $69 a month.
Then it’s time to pick equipment. For DIY 360-degree tours you’ll need:
- Camera
- Tripod
- Memory card
For cameras, Insta360 offers a package that includes the One X2 camera, a tripod and a memory card for around $500. Ricoh’s Theta line ranges from $300 to $1,000 for the camera alone; you can add a good tripod for about $100.
If you’d like to skip the camera altogether and use your phone instead, Asteroom offers a DIY kit that includes a tripod and rotator. The cost for the pair is $110. If, however, you decide you want to use a camera, the kit is also compatible with Ricoh, Insta360 and Trisio cameras.
Though the upfront cost might feel like a heavy lift, shooting virtual tours yourself is much more affordable than hiring a professional every time, says Filliponi.
Testing the Options
I tested a number of platforms. Five of those were done by professionals. For the others, I opted for DIY with a few different camera options.
I found the DIY process straightforward. Using one of the above-mentioned apps on my phone and a camera on a tripod, each 360-degree tour took from 20 to 30 minutes. The Matterport app did require some work to make sure shots were aligned properly to stitch together; each of the others simply had me label the panoramic photos prior to uploading. Ricoh’s tour platform required adding navigation points and choosing starting points. Of the DIY options, only Asteroom included a floor plan; the others required uploading your own. Ricoh plans to release an automated feature to create floor plans from the 360-degree images in the near future.
There can be discrepancies in room measurements and overall square footage among platforms. "We really hang our hat, so to speak, on our degree of accuracy," says Michael Vervena, VP of sales & marketing for iGuide. "We know from studies buyers want accurate and reliable listing information. Accurate square footage and room dimensions are critical for providing the best service for buyers and sellers so they can easily make informed decisions."
Here are some examples of the various platforms and camera solutions. Click on each link for a look at the 360-degree video the listed platform and camera produce.
Professional 360-Degree Tours
- Matterport shot by professional using Pro 2 camera
- RealVision shot by professional using DSLR
- Asteroom shot by professional using Trisio
- EyeSpy360 from Obeo
- iGuide
DIY 360-degree Tours
- Asteroom shot with cellphone
- BoxBrownie shot with Theta Z1
- Matterport shot with Insta360
- Ricoh360 tours shot with Theta Z1
Using Tours on the MLS
Using 360-degree tours on the MLS requires that you take steps to ensure you’re in compliance with MLS policy. First, make sure the tour is unbranded. Next, there can’t be any external links within the tour—you’ll want to comb all aspects of the tour, including the map and disclaimer, to make sure there are no external links. Most companies are aware of this requirement and have the option to turn off the links to make the tours MLS-friendly. Be sure to verify compliance ahead of time to avoid a fine from your MLS.
If you haven’t embraced 360-degree tours for your listings yet, hopefully, you might try them. There are many ways to capture a property, and it doesn’t have to cost a lot of money. It was a lot of fun testing these different solutions. Which do you think looks best? What listing trends are you seeing in your marketplace?
Source: "Why Invest in 360-Degree Tours and How to Get Started"
Comments